Art Designs and Patterns to Draw Anime Drawing Ideas
Contents
- Getting to grips with Anime-style coloring
- Prune Studio Paint's tools & how to set them up
- Walkthrough
Part 1: Getting to grips with Anime-style coloring
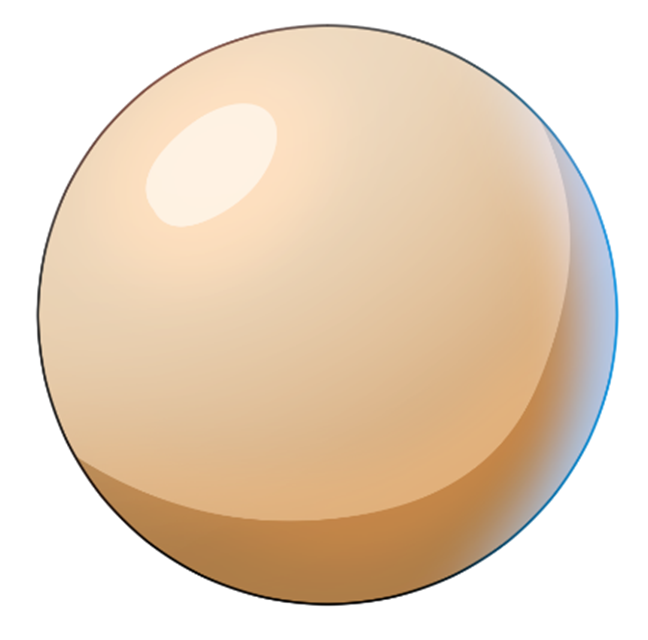
Anime-mode or Cel Shading coloring is a style that mimics how traditional anime was animated. It practical elementary shading without blending to get in easier to breathing.
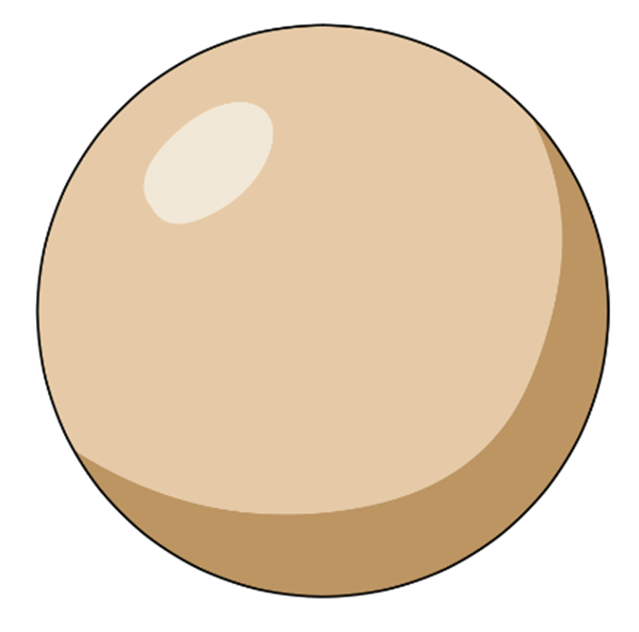
To enhance this kind of coloring style, yous tin can utilise other tools like gradients or furnishings. You can even utilize filters to give an illustration a detail atmosphere or feeling. Since this coloring way is very heart-catching, it is non simply used in animation but also in analogy.
Advantages:
- Depression difficulty level
- Doesn't take a lot of time
- Easily practical and changed
- Easily adapted to other coloring styles
Part 2: Prune Studio Paint's tools and how to ready them up
In Clip Studio Pigment, tools are organized by type. Each Tool has sub tool categories. The drawing tools are all in the same category in the sub tool palette.
Tip: Try out different Pen and Pencil tools to find the ones that suit you lot. You can use Pencil tools for sketching and Pen tools for line art. There are besides lots of other brushes you can use, such as airbrushes for uncomplicated gradients and ornamentation brushes for making patterns. Additionally, you can likewise download more brushes from Clip Studio Assets.
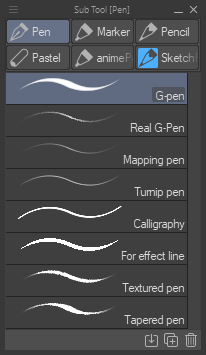
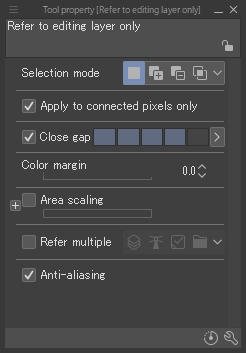
Once you've finished your inking, apply the pen tool and the make full tool to color. For this tutorial, nosotros will be using the pen tools that produce more than of a solid, opaque line, like the G-pen, for example. With the Fill Tool, we volition mainly be using the Refer only to editing layer and Refer other layers options.
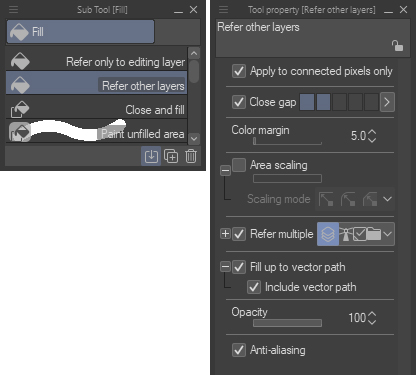
Let's have a wait at the Make full Tool'due south settings:
Utilize to continued pixels simply: if this is checked, information technology will fill up the connected surface area. But if you uncheck it, it will not make full the connected area, merely instead, information technology will fill up all the areas that are the same color on that layer in the color you lot are filling with. For example, if you click on a blue area, it volition fill every blue area in the layer with the color you choose.
Close Gap: if fix to 0, if y'all try to make full in an area and in that location are gaps in the line art, the color will fill areas that aren't enclosed. All the same, if you lot increase the value, it will become less sensitive to small-scale gaps in the line fine art and won't spill over as easily. Then once more, if gear up besides high, it won't evenly fill small-scale areas.
Area Scaling: this will permit you to fill a little bit closer to your line art and help cover the edges between the fill and the line art. But if yous set information technology too high, it will make full past the line art, so please exist careful.
Scaling Fashion: There are many options hither. You lot tin can play around with them to run across what best suits your work.
Refer Multiple: this will permit you to refer to other layers when filling. Utilize this setting when you want to go along the line art and colors on divide layers.
There are 4 options here:
- All layers: volition refer to all layers on the canvas.
- Reference Layer: volition simply refer to the layer that you prepare equally a reference.
- Selected Layer: volition simply refer to the layers currently selected.
- Layer in binder: will refer just to the layers in the current folder.
Please use them every bit needed.
With the default tools that Clip Studio Paint provides, the but deviation between Refer only to editing layer and Refer other Layer is the usage of Refer Multiple. When you lot understand the differences betwixt these tools, they will be easier to use. So there'due south no demand to change the setting each fourth dimension; instead, you'll be able to choose the right tool for the job.
Opacity: this is how opaque or transparent the color is when you fill.
Anti-aliasing: this will soften the edges of the lines and make them look less jaggy.
Auto Select: otherwise known as the Magic Wand tool. This tool allows y'all to select a specific expanse of the same color. The settings for Auto Select are like to the Fill tool.
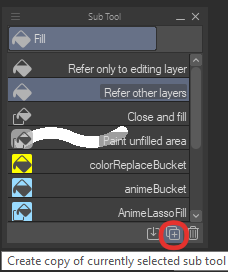
Making Custom Tools
This time the goal is to make a fill up and colour pick tool that ignores the threshold. For example, if y'all desire to change a specific color in the whole paradigm or select a specific color to draw in.
To make your own custom tool:
- Start past selecting a default tool to use equally a base.
- Click Create a copy of currently selected sub tool (the small-scale icon with two squares and a + symbol at the bottom of the sub tool carte), and you volition be able to make a new tool.
- Rename and change its icon and color and so you can easily find it.
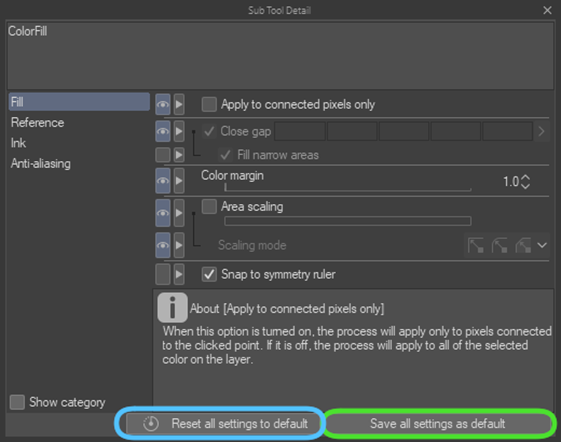
Now you've got the base of your new tool; y'all tin change its settings by clicking the spanner icon at the bottom of the Tool property tab. This fourth dimension, nosotros want to fill all the specific colors in the image, so uncheck Utilize to continued pixels only. To save the changes you've made to the tool'southward settings, click Save all setting as default in the Sub Tool Particular dialog box. After saving, if you accidentally modify the setting, you can easily revert to them by clicking Reset all settings to default.
Part 3: Walkthrough
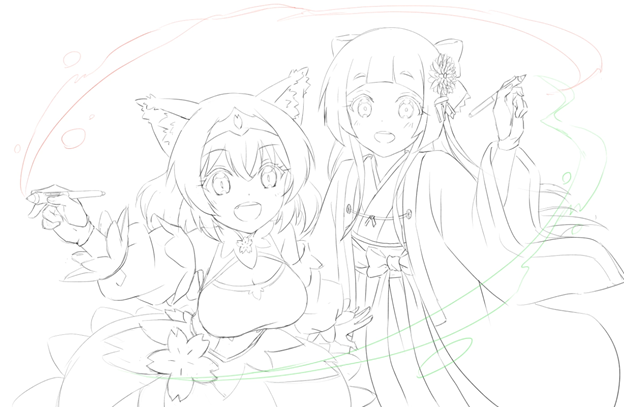
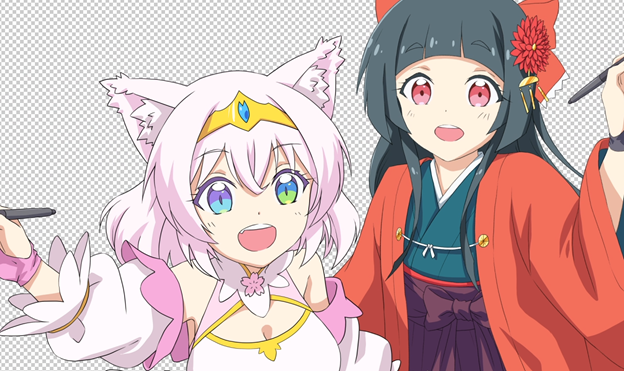
1. Sketch out your thought
2. Paint on the shading guides
Because the sketching stage is just a crude outline of your idea, you don't take to spend a lot of time on information technology. This gives you time to focus on the direction of the light and where to put the shading. For at present, don't worry virtually the colors.
3. Inking
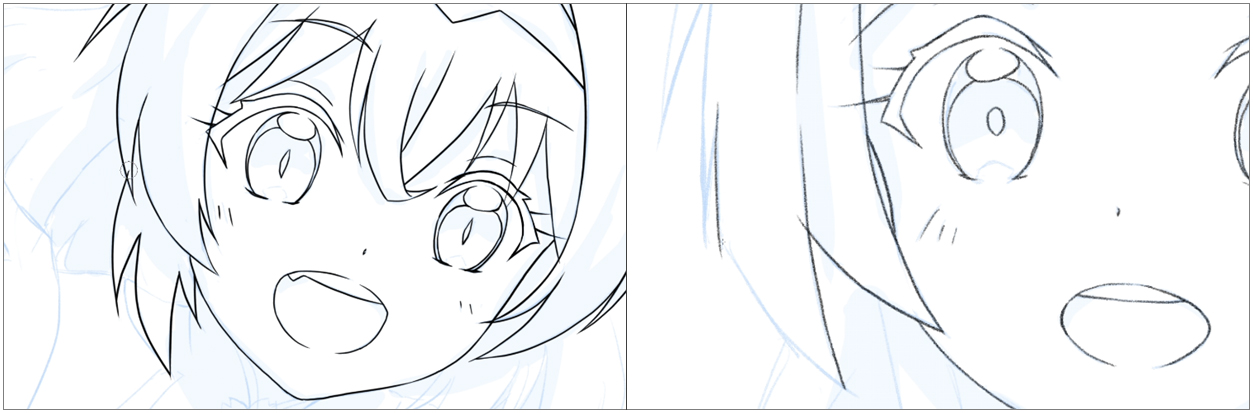
For the line art, let's use a vector layer. Vector layers are unlike from raster layers. Meet this article for a good caption well-nigh how they're different: https://tips.clip-studio.com/en-us/articles/600 You lot tin utilise whatsoever pen, pencil, or brush you like to practise line fine art. This fourth dimension I used the One thousand-pen and Real Pencil.
If you desire more of a paw-drawn wait, it'due south best to apply a pencil tool. Simply if you want it to be sharp similar in anime, the G-Pen volition help y'all attain that outcome.

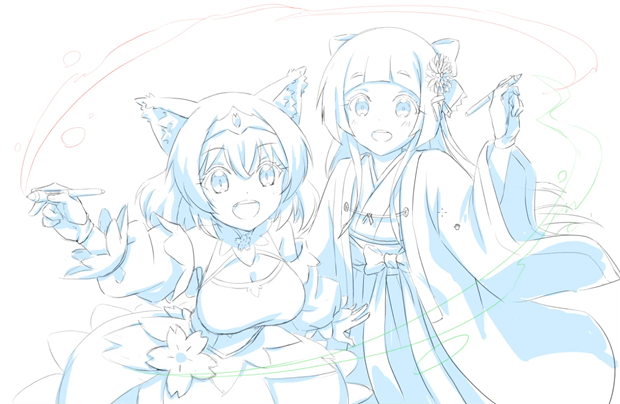
iv. Base of operations Colour
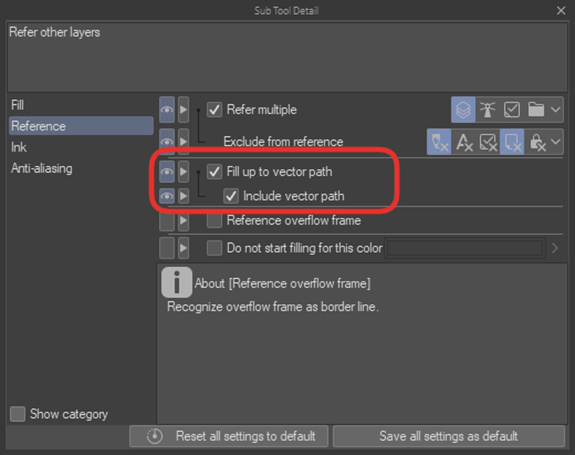
Begin by creating a raster layer and identify it below the line art layer. Then use the make full tool to lay down your base colors. Utilise the Refer other layers sub tool to fill in the line fine art layer. To stop white pixels appearing in between your lines and the base colors, apply the Fill upwards to vector path option in the Tool Belongings tab. Instead of filling up to the edge of the line, information technology volition take the vector line into consideration, which means it will fill up in all of the anti-aliasing parts of the line as well. If you go farther into the tool settings, at that place's an Include vector path checkbox as well. If checked, it will fill to the heart of the vector line.
If y'all're drawing a character from a reference image, you can use the subview to bear witness the reference image and the color picker to make sure y'all are using the same colors as your reference.
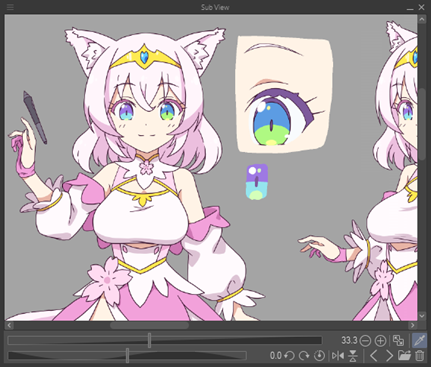
This is a very handy feature yous can use instead of opening multiple reference images and switching through them.
If you want to change a specific color, yous can utilize the newly created make full tool to easily modify the color.
5. Shading
If yous determine your light source when sketching, you can and so do your shading accordingly. Commencement, create a new raster layer. Then select an opaque pen tool such as the Grand-pen so that you tin can fill up the color the shadows in evenly. Then describe lines to create the shape of the shadows according to your sketch. Although we are using our sketch as a reference, if you see room for improvement when cartoon the shadows, then brand adjustments every bit you lot see fit. Also, exist sure to use the newly created pick tool, and so you don't get over the line art'south edges. Now, observe the color you lot want, and then apply the pen to draw the shadow's edges. Or if you see some areas that can be colored completely, do it.
You lot tin can also apply the fill up tool for this step. It's best to continue the sketch layer, the line art layer, and the fill layer in separate folders. And modify the fill tool setting from refer multiple to layer in folder. This will be super helpful for filling in the colors!
six. Highlights
The process is the same as shading, but brand sure you create a new layer for the highlights and then they're easier to edit.
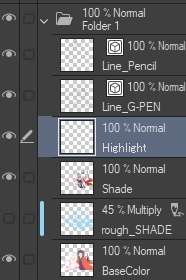
seven. Layer Direction
Anime-style coloring is not complicated. And then y'all shouldn't take also many layers. Even so, it'south a good idea to keep your layers organized and named and then they're easy to find. Since yous're not juggling likewise many layers, and y'all'll just be blocking in color, yous tin utilize the choice tool to easily select any areas you lot desire to adjust. If yous want to brand a work with more detail, you tin can ever create more layers later. Today, however, we are going to take it easy.
8. Add more details to your illustration
For example, add some blush to those cheeks!
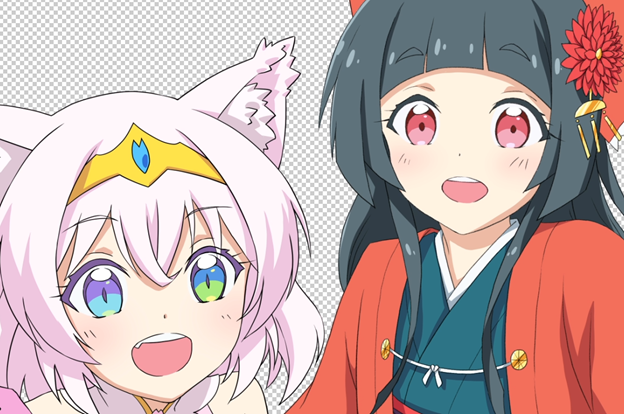
For this stride, select the peel color, then create a new layer and lightly utilize the airbrush over the cheeks to add a affect of pinkish. If yous want to add some gradient shadowing with the airbrush to other parts of the character similar the hair or clothing, don't become overboard – just add a low-cal touch. Less is more here!
▼Animated GIF

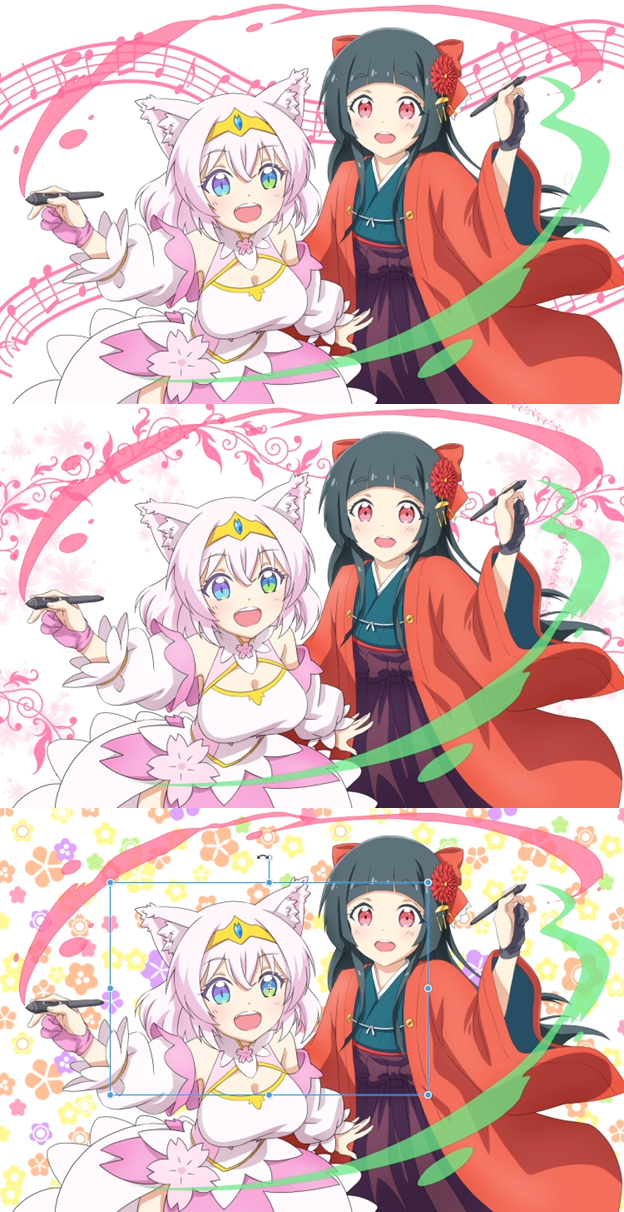
9. Background
If you're non familiar with or sure how to draw backgrounds, a simple and effective way is to use patterns or decoration brushes.
There are some materials pre-loaded in Clip Studio Paint in the Material palette. Yous can too download more from Clip Studio Assets.
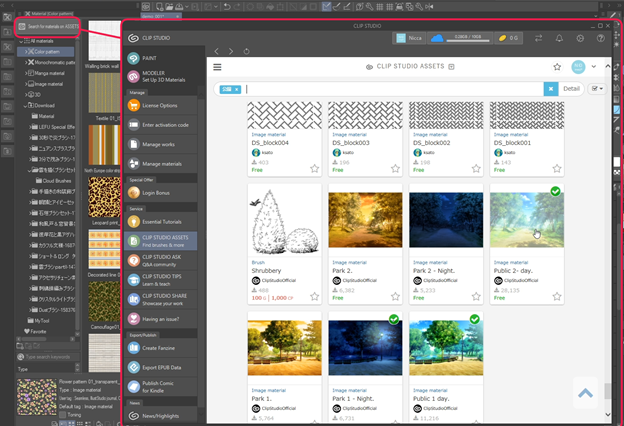
After downloading, y'all will find information technology in the Download folder on the Material tab.
If you want to apply background or pattern materials, but elevate them from the Fabric tab and drop them onto the sail. Then use the object tool to accommodate them equally much as you like. In the case of castor materials, but drag and drop them to the subtool tab of your choice. And so you can employ them as yous would any other castor.
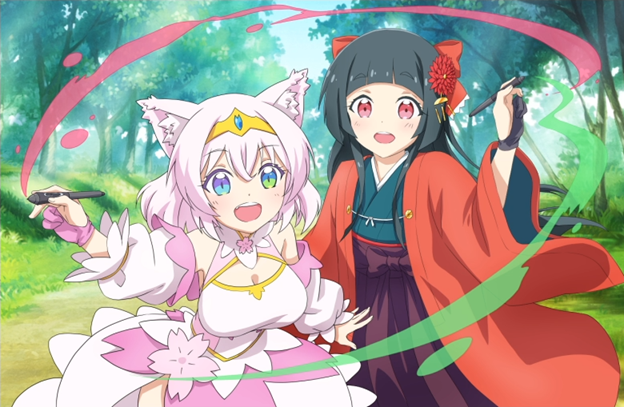
10. Decorations
Other than adding the background, yous can add other details to the foreground of the image, like sparkles, petals, or patterns.
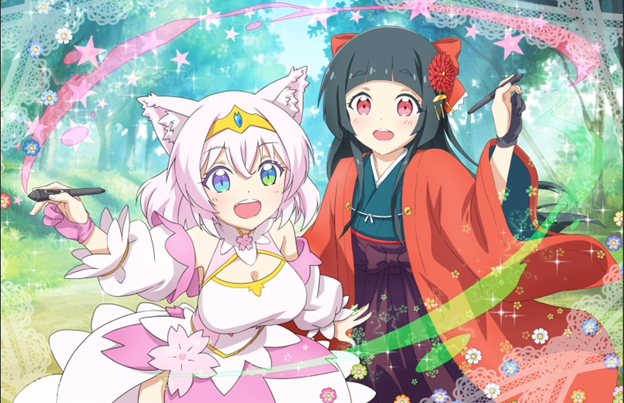
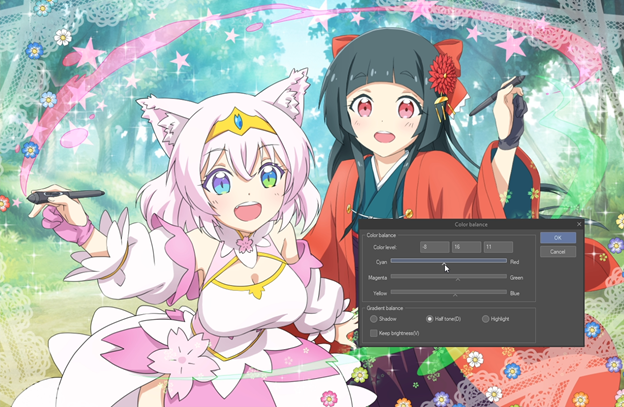
11. Adjusting Colors
When you add the background, you might need to adjust its color to compliment the characters. Instead of recoloring the whole groundwork, you can make utilize of Correction Layers.
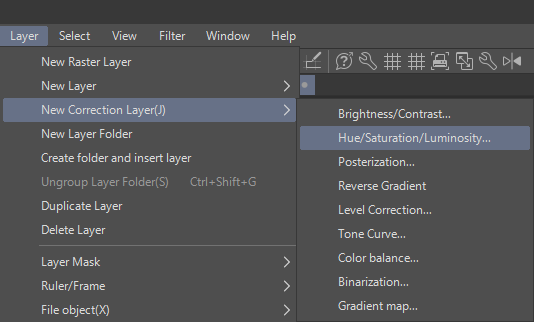
The commonly used options are Tone curve, Color Balance, Hue/Saturation/Lightness, etc. This fourth dimension we will accommodate it a little so they don't dissimilarity besides much against the background.
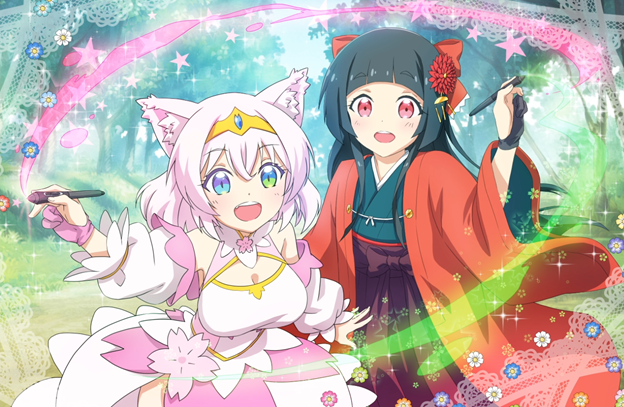
In addition to Correction layers, you can hands adjust the colour of your characters using the Clipping Layer choice.
Furthermore, you tin also change the Layer blending modes (the drop-downwardly menu on the Layer palette) such equally Overlay or Soft Light, to adjust the color. Then apply the airbrush tool to smooth things over and requite the illustration a softer look.
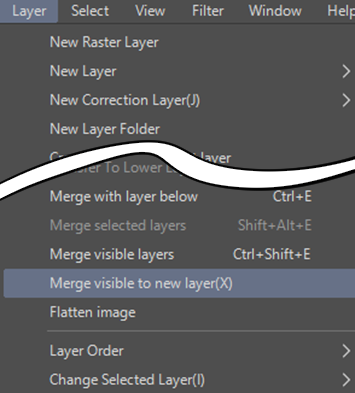
Actress Tips: Diffusion & Glow
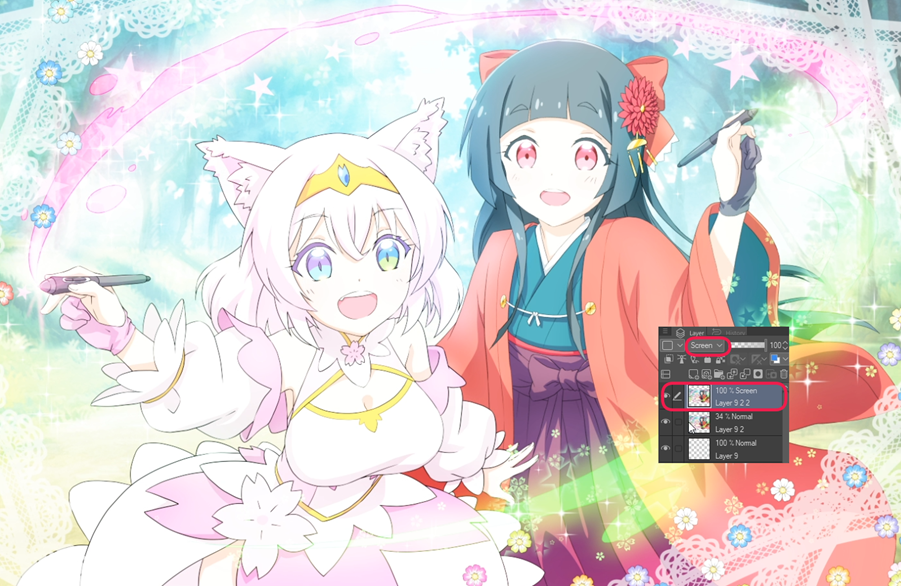
Employ the Merge Visible to new Layer command to merge all the layers to a new layer. Then, brand a duplicate.
By applying Gaussian blur on the meridian layer (spend some fourth dimension playing with the settings to observe the correct level for your illustration) and decreasing the opacity by near 20 – forty%, you tin soften the illustration even more.
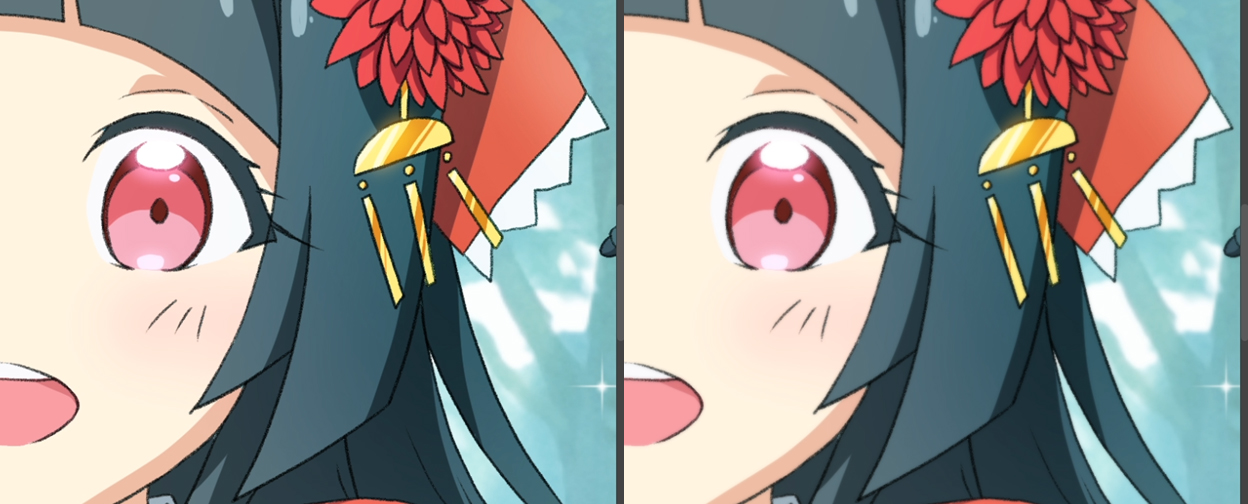
To get a glowing result, select the duplicated layer, and change its blending mode to Screen.
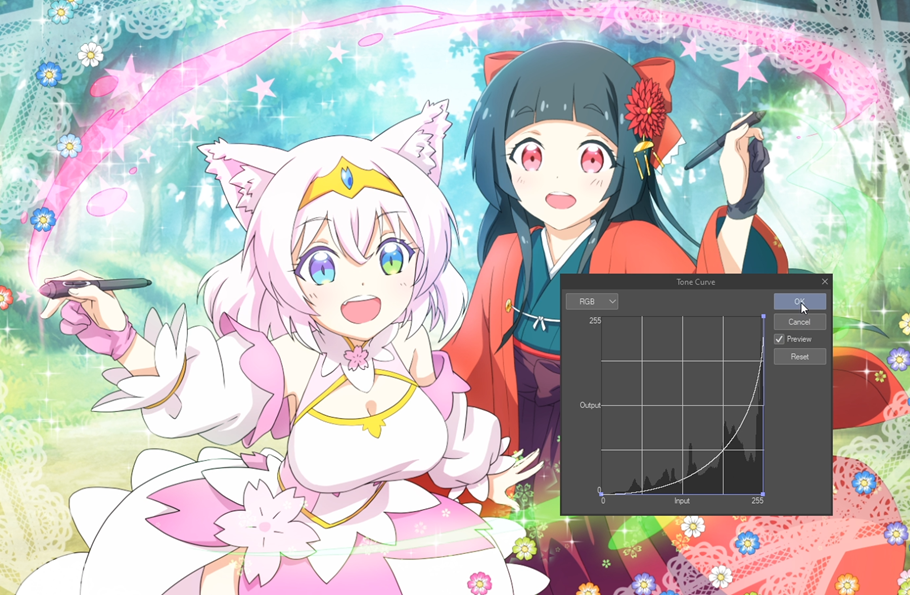
Utilise the Tone Curve command and conform the curve downwardly.
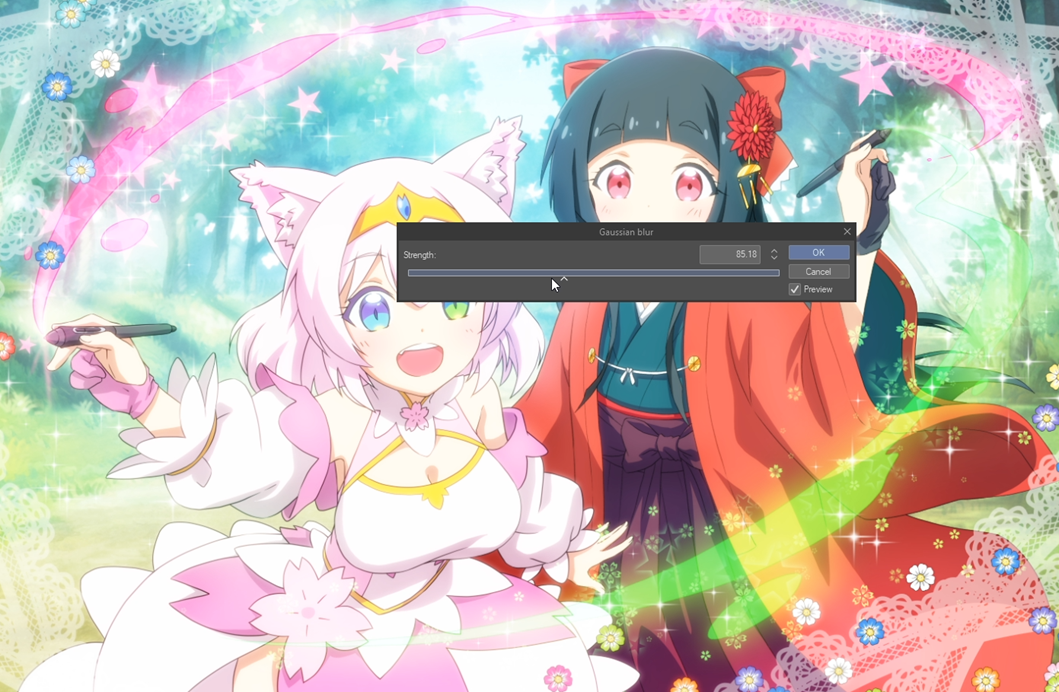
And then apply the Gaussian blur I explained before and decrease the opacity by about 20 – 40%. Et voila!
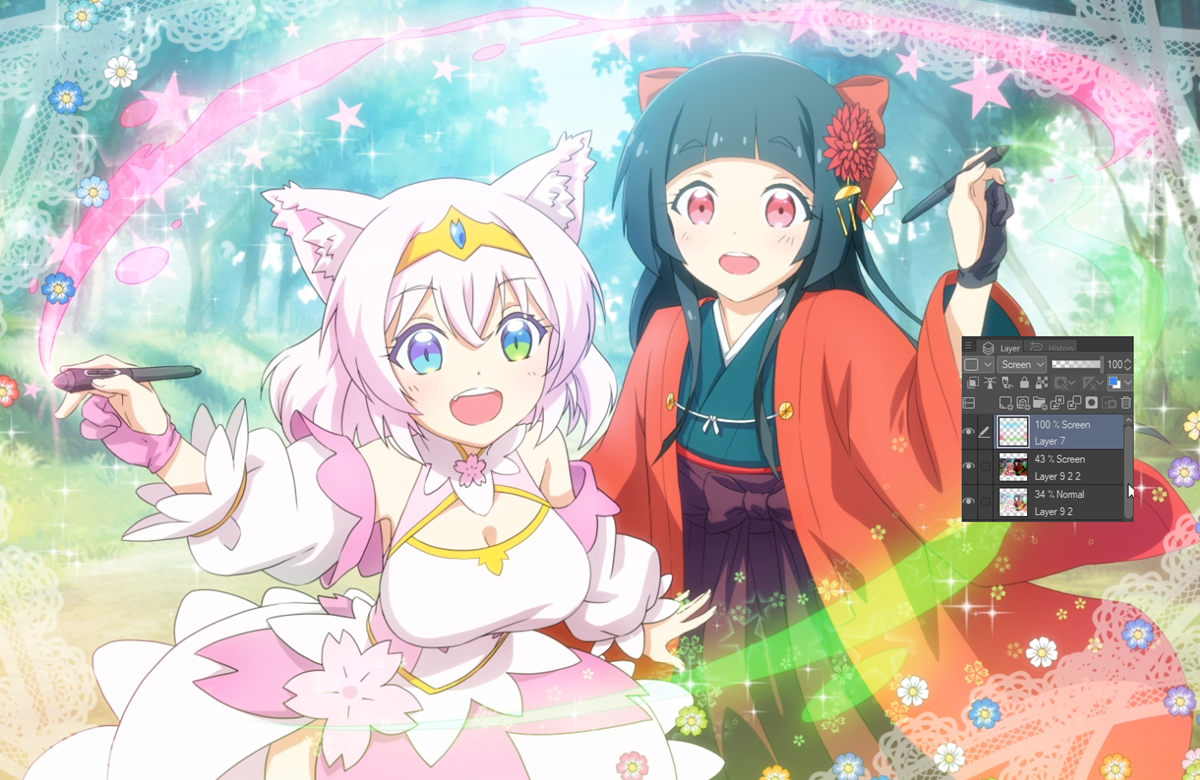
I'll share one final secret with you to burnish up the feel of the illustration. If you create a new layer above all your other layers and alter the blending fashion to Screen, then employ the airbrush to add together a light colour effectually the edge of the sheet, it makes the image brilliant and shiny as if in that location is calorie-free shining through the air!
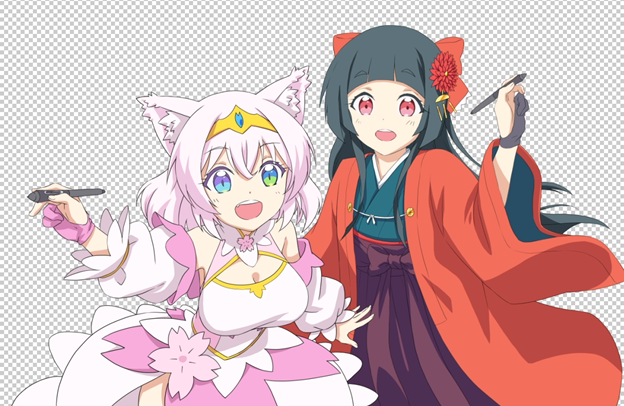
Accept a look at the terminal illustration and download the file here.
williamsackelvel60.blogspot.com
Source: https://www.clipstudio.net/how-to-draw/archives/162911
0 Response to "Art Designs and Patterns to Draw Anime Drawing Ideas"
Postar um comentário